The content in this guide is currently being revised to align with the new user interface. Some text and images may be outdated.
Connectwise Import
Import to Accelo from Connectwise with a few simple steps and make your business faster more efficient and easier to manage.
Set up an Integrator Account
Before you import your data from Connectwise, you will need to set up an Integrator account within Connectwise. To do this:
-
In Connectwise, go to System > Setup Tables > Integrator Login List
-
Create a new user:
-
- Choose a new Username and Password
- Access Level: All Records
- Then Enable ALL the available API’s
- In setting up the user, you will need to manually check the Service Ticket API. You will need to choose one Service Board
After that, you'll want to create your API Keys.
-
Navigate to the bottom left, and go to Settings ---> Members.

-
Click on the API Members.

- Add a Member by clicking on the + symbol, and fill in all necessary details for yourself. This information isn't vital for the import process itself, but it is important for you to keep your API Members organized and sensible. Example in the screenshot below.

-
Next click on the API Keys tab.
-
Click the + icon, enter in a Description (preferably something to remind you it’s for Accelo) and then save. The page should refresh and show you a Public and Private key (blank in the screenshot, but you should have a value populated in yours). Make sure to copy and save these keys, as they'll only be available when you create them.

Developer Client ID
For security reasons, Connectwise has introduced the concept of an API Client ID. This requires you as the Connectwise user (or Partner in the Connectwise terminology) to register as someone who will be using the API to access your own private data through the Connectwise API.
If you've already registered as a Connectwise developer, you can skip to Step 2 in this section.
Step 1: Register as a Developer
Go to register.developer.connectwise.com to register as a Developer for their "Manage" product and as a Current Partner.
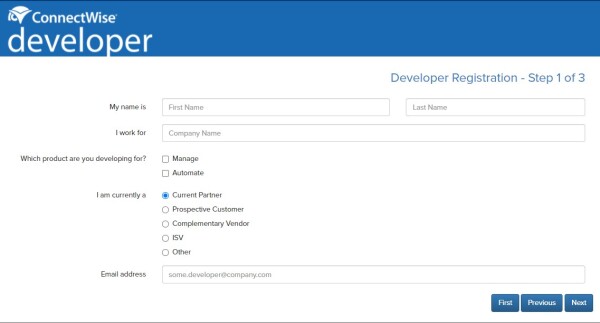
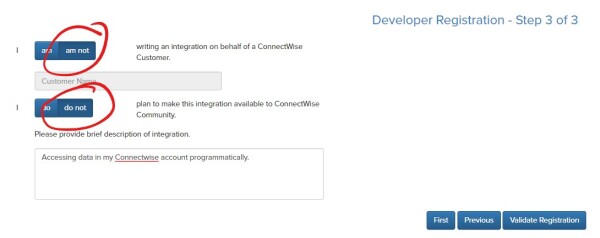
After you accept the Terms and Conditions as a Partner (recognizing that the API is not supported), you have one last screen where you make it clear that your role as a developer is just for your own purposes and you won't be trying to publish anything to the Connectwise community.
Once you register, it may take a little bit of time for Connectwise to review your application.
Step 2: Register for ClientID
Once you've been accepted as a Developer, you'll need to log in to developer.connectwise.com. After logging in you'll have the CLIENTID navigation heading in the top left and then you'll want to click on Partner Client IDs.
Once you're on the page at developer.connectwise.com/ClientID/Partner_Client_IDs, you'll want to click on "Create New Integration".
From this screen you'll need to create a Client ID. We recommend you keep your inputs here pretty generic - mainly focus on the fact it is about you having access to your own data.
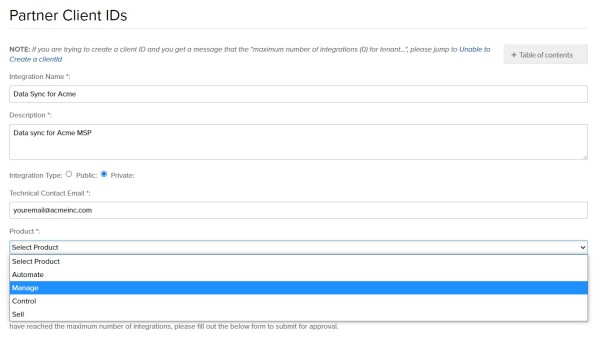
Once created, you'll see the Client ID in the interface and you'll be able to then set up the import process for your own data with you as the developer.
Import Data into Accelo
After you set up an Integrator account, navigate to Configurations and find Import & Exports to start the following step by step process:
-
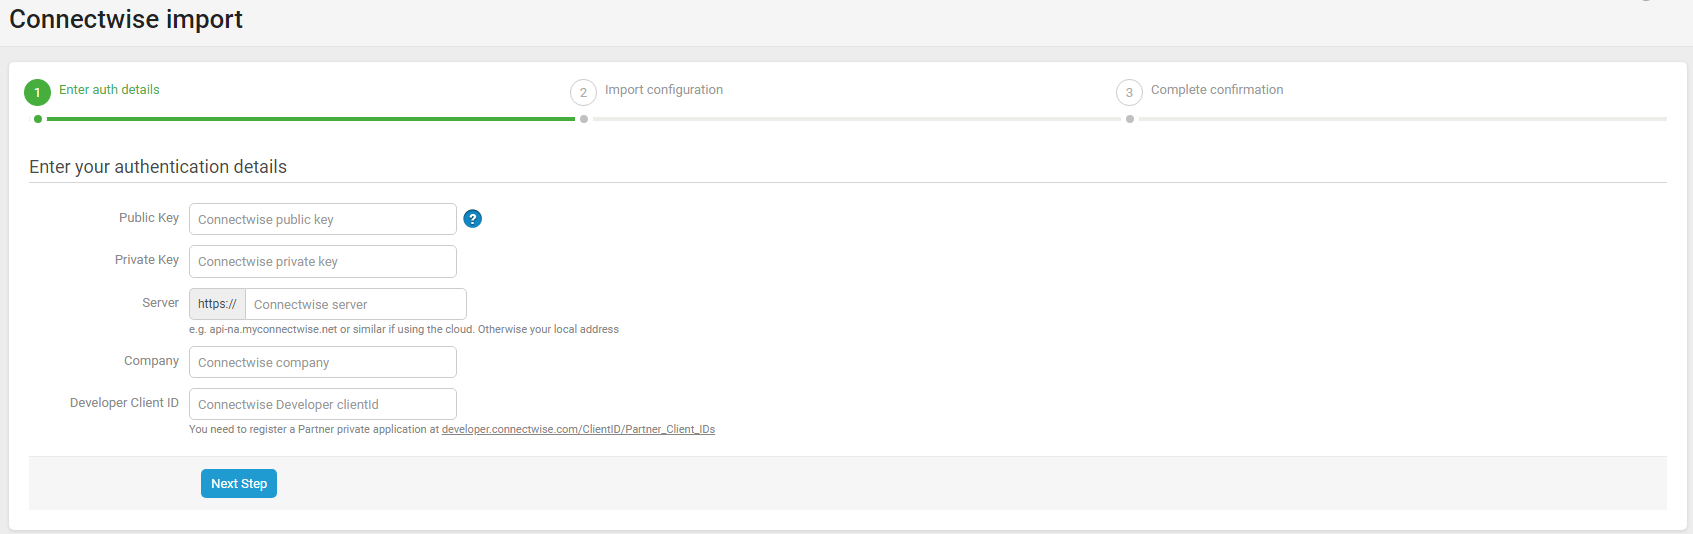
On the first step of the Connectwise Import, enable your authentication details by entering your Public Key, Private Key, Connectwise Server, Connectwise Company Name, and Developer Client ID. This is not your normal login, it is the Integrator login account (see above). Click the Next Step button when you're ready.
-
The second step of the Connectwise import is to set your import options. You'll have to choose the status that you'd like to import your Companies under, whether you'd like to import tickets from ConnectWise as Accelo tickets, and map your Connectwise staff members against Accelo staff so that imported issues will be assigned to the correct staff member.
 Note: All companies and contacts will be imported from ConnectWise, regardless of status
 -
Once you've clicked the Start Import button, you'll be presented a confirmation screen that the import has begun. When the import has completed, you'll receive an automated email to let you know when an import is complete.

What Information is Imported?
Accelo imports the most critical details of your ConnectWise tickets, companies and contacts, including:
Tickets
- Ticket Number
- Ticket Summary
- Initial Description
- Assignee
- Status
Companies
- Name
- Company ID/Code
- Status
- Primary Contact
- Address
- Website
Contacts
- First and Last Name
- Email Address