The content in this guide is currently being revised to align with the new user interface. Some text and images may be outdated.
When to use Tickets
Tickets help you deliver consistent and streamlined client service, easily. Open a Ticket for a quick place to start tracking your smaller billable work. Easily convert tickets from emails. Organize your tickets so everything is in one place. Automate tasks against a ticket to save time and ensure all work is completed on time.
Tickets allow you to complete work on a more agile scale than Projects. While Projects are used for longer, multi-stage tasks to be completed by one or many members of your team, Tickets help you to quickly open, log, and bill for the short-term work you do.
Utilize Tickets when it involves billable work that can be completed in one phase, such as:
-
A Consulting Session
-
Administering an Enhancement
-
Fixing a Bug
-
General Client Work
Click Next to learn how to Create a Ticket.
Try it Yourself: Create a Ticket
Add a Ticket from any page using the Create button, add a Ticket against a specific Client, or convert an email in the Request Inbox directly into a Ticket. Keep track of the work your team completes, run better reports for cost analysis, and easily send invoices to clients.
Using this guide, you can:
Learn more about Accelo's Ticket Module
Add a Ticket
There are five ways to create new Tickets, making it easy to start and keep track of any new work you are doing for clients.
Add Tickets using the Create Button
The Create button is a handy creation tool that will begin the process of creating most Objects within Accelo.
To add a ticket using the create button:
-
At the top of your screen, hit the +Create button and select Ticket.

-
Enter the Ticket Title, the name of the Client/Company the Ticket is being logged against, as well as the Company Contact for the Ticket.
-
Select the Type of Ticket, Ticket Class, and Level of Priority, and status of the Ticket. You also have options to create the Ticket against an existing Retainer, and add any Tags to the Ticket.
-
Enter a Description for the Ticket, and assign it an Issue Manager. The Description can be any details that the client gave you, or simply a list of things that need to be done to complete the Ticket.
-
You can also configure Start Date and Deadline Settings for the Ticket, as well as input the budgeted hours and assigned Rate for the Ticket.
-
On the far right of the Ticket creation view, you can see where any Custom Fields created for this Ticket Type would appear. Select the Type of Ticket. There is also the option to choose whether this Ticket is being worked on outside of normal business hours and whether the work is being done on-site or remotely
-
Click Create Ticket.

Note: Depending on the Ticket type and status progression you may have configured, you may be prompted to complete additional steps.
Add a Ticket from a Company Page
The Company View page allows you to see an overview of previous correspondence, work, and revenue completed for a particular Company/Client.
To add a ticket from a company page:
-
From a Company View screen, click the +Add button and select New Ticket from the drop-down menu.

-
Fill in the fields on the Create a new Ticket screen as necessary. Ticket details.
-
Click Create Ticket.
Convert an Activity into a Ticket
Convert any Activity you are viewing into a Ticket easily in order to maintain any details saved when the Activity was logged.
To convert an activity to a ticket:
- Find the Activity you want to convert by clicking on the Search bar drop-down arrow.

- Select Activity.

- Press Enter to see a list of all Activities.

- Search for or select the name of the Activity you wish to view.
- Click the Convert button and select Ticket.

- Fill in the fields on the Create a new Ticket screen as necessary. Ticket details.
- Click Create Ticket.
Convert a Request into a Ticket
Converting a request to a Ticket will automatically remove it from the request queue and turn it into a ticket so your team can continue to do more detailed work on the service request.
Converting a request is the ideal way to start a Ticket for a problem that has been brought up by a client, as any details or images they provide about the issue will automatically move to the Ticket profile.
To convert a request to a ticket from a Request Inbox:
-
Hover over the Inbox button on the top right of the Navigation bar and select the Request Inbox you would like to view (Support, Sales, etc.)

-
Find the Request you want to convert to a Ticket from the list on the left and click on it to view details on the right.

- Click the Convert button and select New Ticket from the drop-down list.

- Fill in the fields on the Create a new Ticket screen as necessary, The Title, Company, Contact, Type, Status and Description fields will auto-fill. Ticket details.
- Click Create Ticket.
Convert an Email in your Inbox into a Ticket
When a client emails your email address directly out of the blue about a bug, or maybe they email you directly for a quick fix (ie - update an image on their homepage), that doesn't require you to start a whole project, you can convert this email to a Ticket. You can find this email in your personal Inbox, and instantly start work on a Ticket.
To convert an email in your Inbox to a ticket:
- Click on the Inbox button on the Navigation bar.

- Find the Email you want to convert to a Ticket from the list on the left and click on it to view details on the right.

- Navigate to the dropdown menu and select Convert to Ticket.

- Fill in the fields on the Create a new Ticket screen as necessary. Ticket details.
- Click Create Ticket.
Assigning Tickets
Search, filter, sort, and export your tickets to see detailed snapshots of collections of tickets within a time period. Using reports, you can monitor daily ticket activity, user performance, compliance with your service level agreements, average resolution times, and whatever custom fields fit your business.
Using this guide, you can:
Assign Tickets
Assign Tickets to users easily and efficiently through multiple methods to ensure that you find the right person to complete the job. Assign tickets from the Ticket View page, assign tickets in bulk from the Tickets Module, or Assign tickets to users using Team Scheduling if you have a Premium account.
Assign Tickets from the Ticket View page
Assign tickets from any Ticket page to make sure the right person is working on it, or Re-Assign the Ticket if you need to pass it off to another user.
To assign a Ticket:
- On the View Ticket page, click Add next to the Assignee section.

- A drop-down of deployment users will appear. Select the desired Assignee.
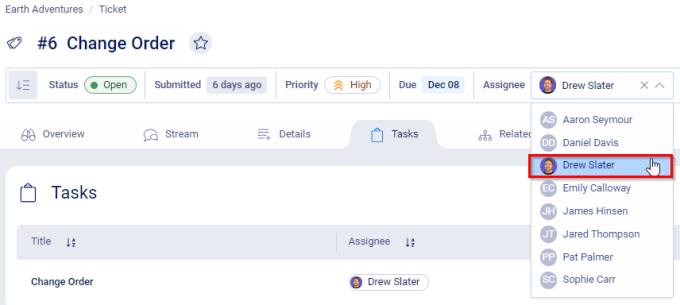
- You can re-assign the Ticket at any time following the same process and selecting a different Assignee.
Create Tasks to Tickets in Team Scheduling
Create work for Tickets quickly and efficiently to the right user using Team Scheduling.
To view unassigned tickets in Team Scheduling:
- Hover over the Schedule button on the Navigation bar and select Team Scheduling.

- Select the Tickets tab.

- Click the Edit button to view Filters.

- Click on the Assignee Filter and select Unassigned to show only Unassigned Tickets.

Assign Tickets to users by Allocating Work in Team Scheduling.
Anatomy of a Ticket
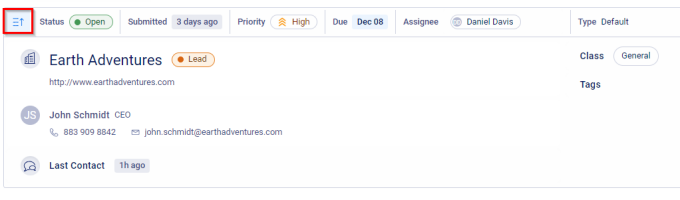
The Ticket view screen provides you a bird's eye view of the Ticket, displaying the status, details including when the ticket was Submitted and when it is Due, the Priority, Assignee, Type, and a plethora of other Settings/Options.

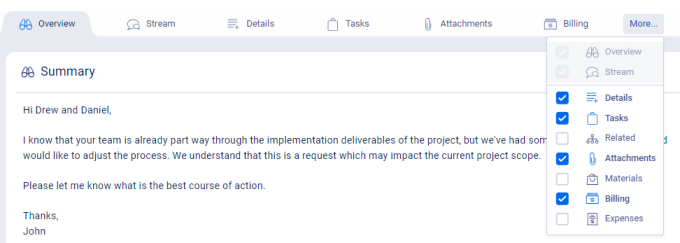
Listed across the center of the screen are several sections and tabs containing information to help you manage your Ticket. You can use the More drop-down to select and deselect the most important tabs you wish to view. Your selections are specific to your user account and will be reflect the same options for all Tickets you view. The Overview and Stream tabs are defaults, and cannot be disabled.
You can view additional details about the Company & Contact, class, and tags by using the Infobar drop-down.
Overview
In the first section of your Ticket, you will find the Summary, Upcoming Tasks, Most Recent Contact Activity, Budget Information, Linked Retainers, and Status History.
-
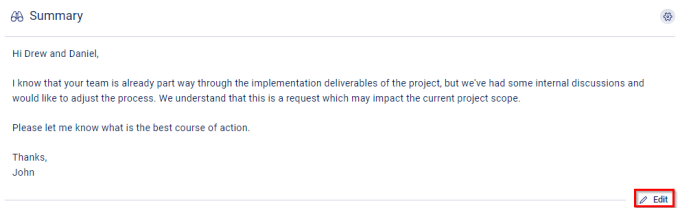
Summary: Includes a brief description of what work is being completed on this Ticket. To edit the Summary, click on the Edit button. Make changes and click anywhere outside of the box to easily Save your work.
-
Upcoming Tasks: A quick view of all upcoming work to be completed against the Ticket. You can expand or collapse the task using the arrows, or create additional tasks using the plus icon. Learn more about Creating Tasks.

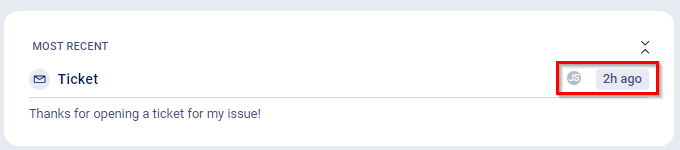
- Most Recent: Your most recent client activity will display here. Hover over the name icon or time to view additional details in a hover state.
- Budget: View all Budget information including Current Value/Budgeted Value, Current Time/Budgeted Time, Rate, Remaining Task Time, and a Progress Bar with current Value percentage.

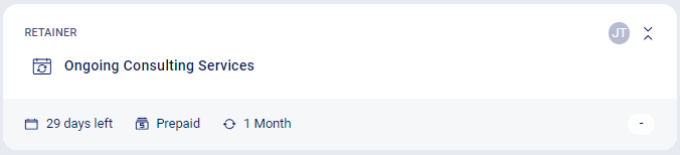
- Retainer: If the Ticket is linked to a Retainer, the Retainer and its relevant details will display here.
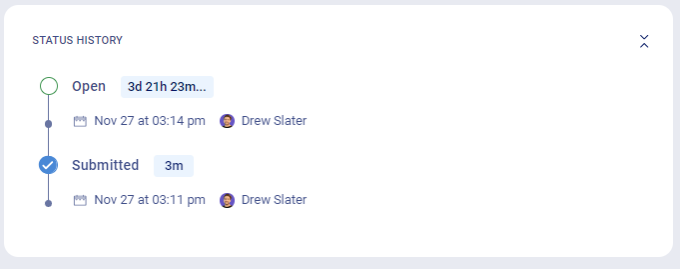
- Status History: Includes information about each Status the Ticket has been in, as well as other relevant details like how long it was in that Status, for example.