The content in this guide is currently being revised to align with the new user interface. Some text and images may be outdated.
Connect Authorize.net to Accelo
Accept credit card payments securely through Authorize.net, making it easier than ever to get paid for the work you do.
Using this guide, you can:
Connect Authorize.net to Accelo
The Authorize.net integration allows you to include an easy payment link on your Accelo invoices, so that you get paid faster for your work! If you don't already have an Authorize.net account, you can register for one at Authorize.net.
To connect Authorize.net to your Accelo deployment:
-
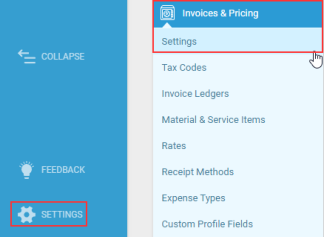
Navigate you general Settings then Invoices & Pricing > Settings:
-
Scroll to the bottom of the page, and under the Authorize.net heading, enter or select four fields:
-
- API Login ID
- Transaction Key
- Receipt Method (determines which ledger these payments will appear under in Accelo and in turn your accounting system)
- Currency (the currency type that matches your invoice values)

Locate your Authorize.net API Information
Your API Login ID and Transaction Key are found at Authorize.net's API site. These keys are available after you log to your Authorize.net account.
-
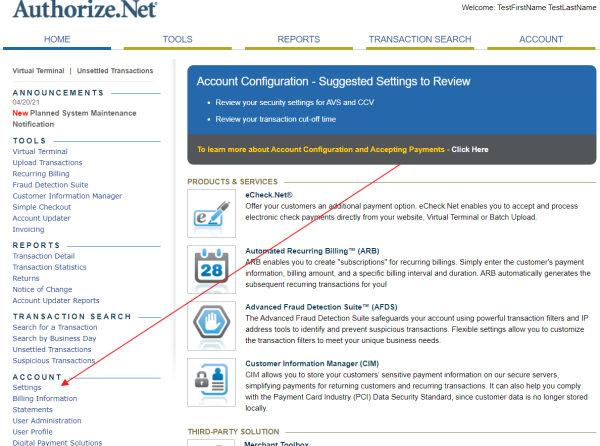
Once you've logged in to your Authorize.net account, navigate to your Account Settings.
-
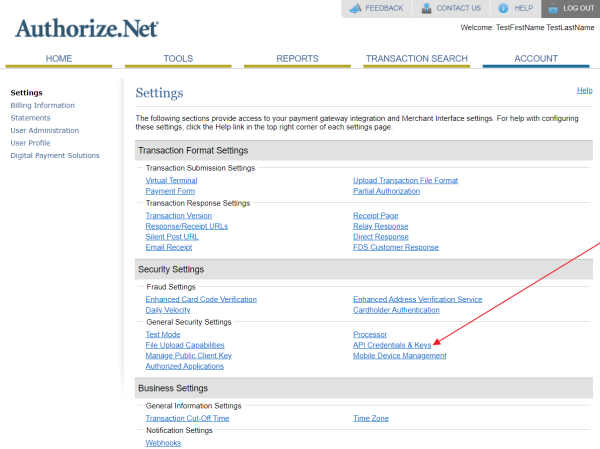
On the Settings page, choose the API Credentials & Keys link under the Security Settings heading.
-
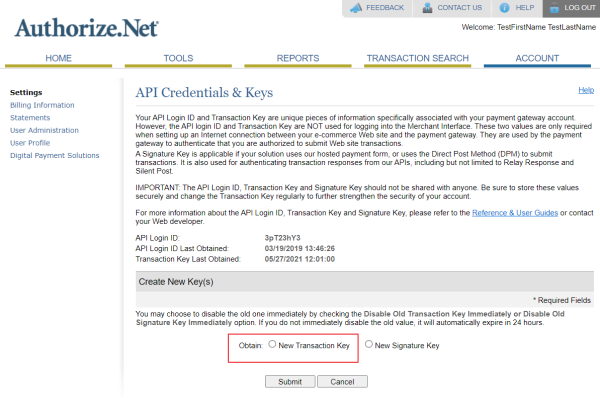
You'll then be presented with your API Login ID; to view your new Transaction Key, you will be prompted to disable your old Transaction Key immediately.
-
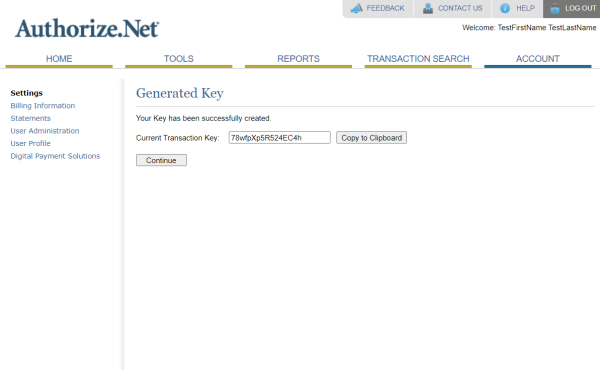
Once you've disabled your old Transaction Key, Authorize.net will display the last piece of data needed to connect your Authorize.net account: the new Transaction Key.
-
After you enter these details into the Settings page, future invoices generated in Accelo will include a link that clients can use to pay for their invoice.