The content in this guide is currently being revised to align with the new user interface. Some text and images may be outdated.
Retainer Periods
Your Retainers are divided into Periods based upon your billing cycle, whether Weekly, Monthly, Quarterly, or Yearly. Your periods are where you log your work and track your usage.
Your Retainer periods will pull in details from your Retainer template whenever they are created, including the defined Rates, all recurring Tasks, and Materials. If you open up any given Retainer, you will see Periods that have been created within that Retainer under the Overview tab.
To open a Retainer Period page, click on the Period dates. All dates are a hyperlink to that period’s retainer page.
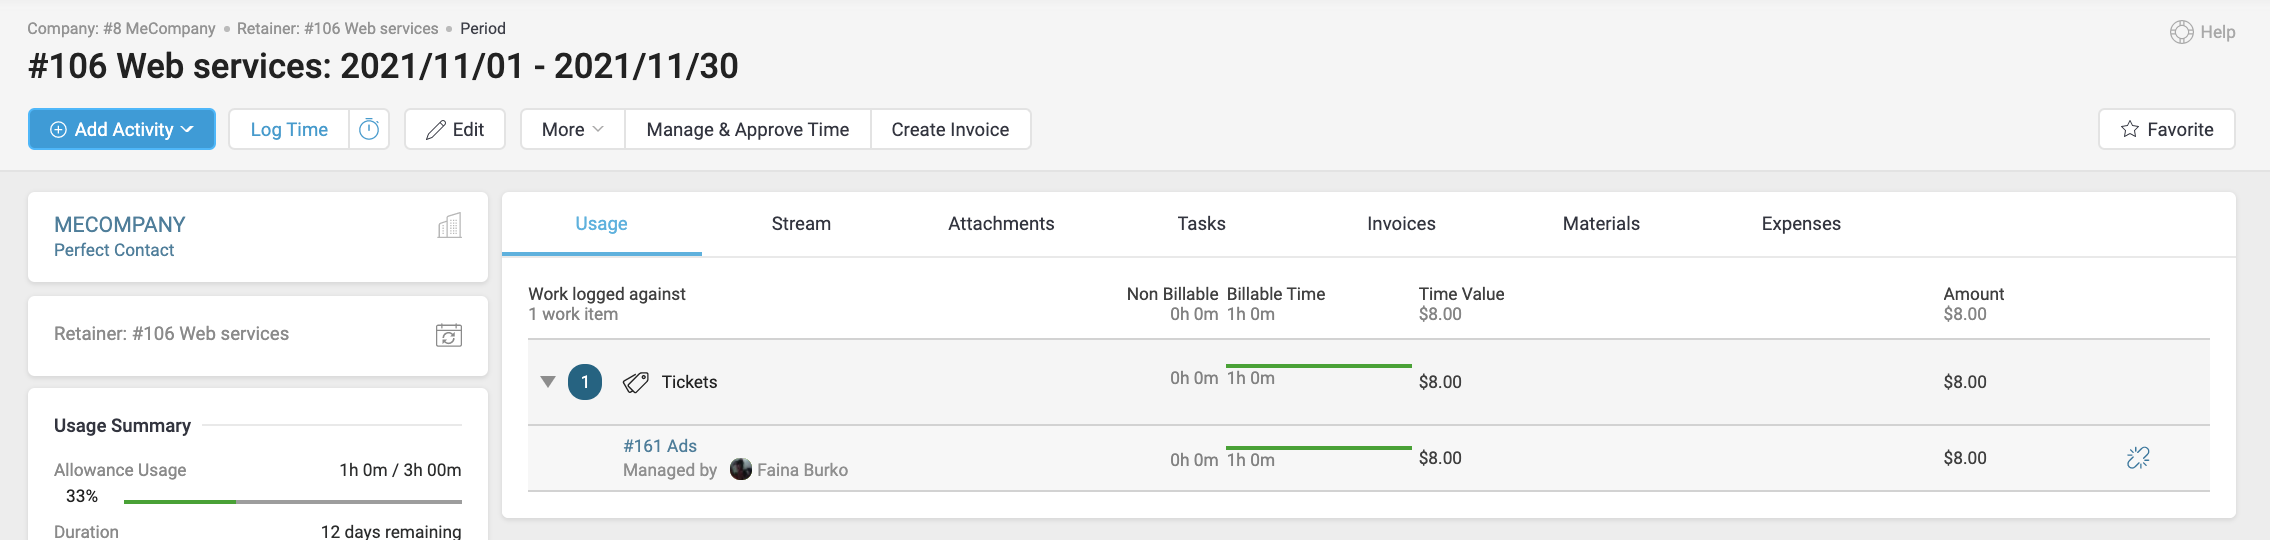
Retainer Period pages help you track and invoice all your recurring services within time period. Open the period to oversee all its Usage, time logged against ongoing work, ongoing Tasks, linked Projects and Tickets, Materials, and any sent Invoices.
The Usage Summary tab allows you to see all time logged within this billing period, divided by each Task, Ticket, or Project the work was logged against. Click the expand button (![]() ) to see a list of how the time is divided over the linked Projects and Tickets, and a list of logged time on Tasks.
) to see a list of how the time is divided over the linked Projects and Tickets, and a list of logged time on Tasks.
Click Next to see how to link your Projects and Tickets.
Link your Projects & Tickets
Link your ongoing support tickets and projects directly to your recurring retainer contracts, and you can track all logged time in a single view. By linking your projects and tickets, all logged time will be applied directly against your Retainer Usage, making it easy to account for all your work, no matter where you complete it.
Accelo looks at the date of your logged time in your tickets and projects, and will automatically allocate the work based upon the Period start and end date. For instance, if your periods are setup monthly, the work you log against a linked ticket on May 5th will appear in your May period usage. If you log work against the same ticket June 19th, it will automatically appear in your June period usage.
All you need to do link your ongoing Tickets and Projects, then as your team logs time on the date they complete work, you can seamlessly monitor your Retainer Usage by period. You can also generate a single invoice for all of the work you complete.
There are two ways to link work from a Ticket or Project to a retainer:
1. If you have already set up your Retainer, you will be able to choose the retainer from a drop-down list whenever you Create a Ticket or Create a Project.
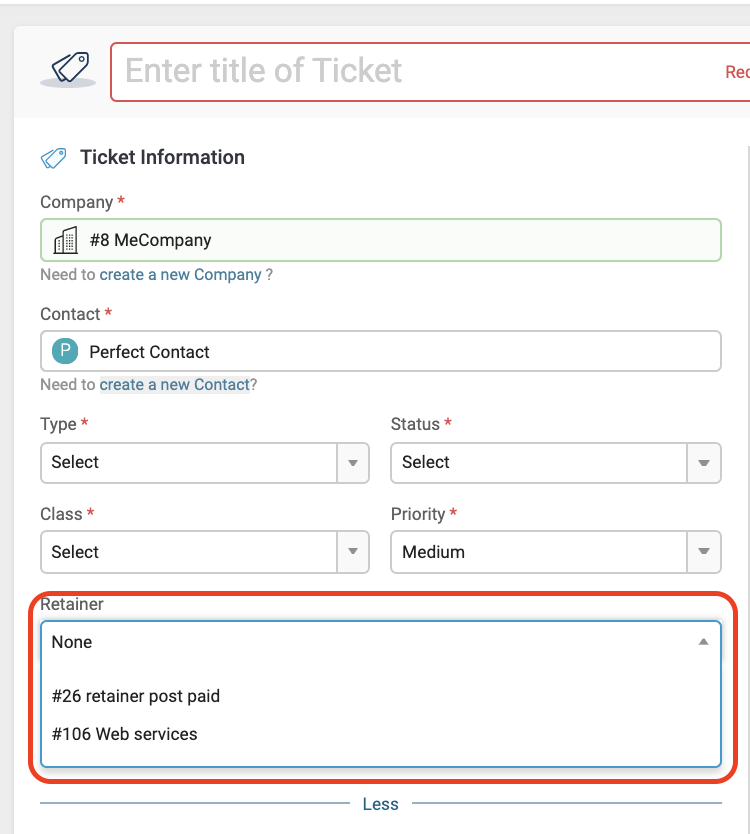
Note: Select Company first to see retainers available. System looks for the Retainers under the same Company you select on Tickets/Projects.
2. If you set up your Retainer after your Ticket or Project already exists, you can link the two after the fact. Navigate to your View Ticket or View Project screen and select Edit > Edit Ticket / Edit Project. Then choose the retainer from the Retainer drop-down list.
Click Next to see how to monitor your Retainer Usage.
Retainer Usage
Oversee your Retainer Usage from the Retainer page or through each Period page, allowing you and your clients to easily track your recurring contracts.
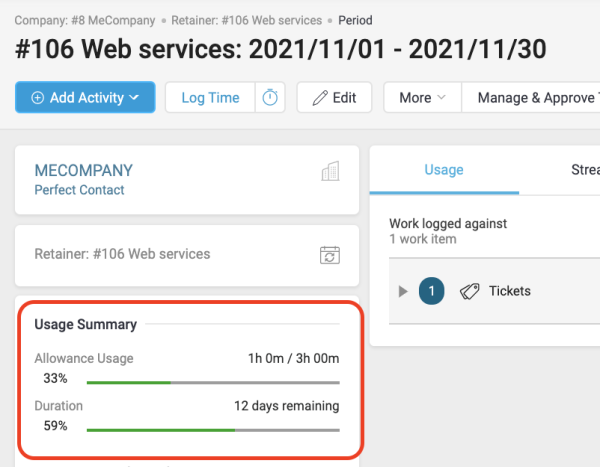
Your Retainer page will show a side by side view of each period’s usage, giving you a succinct way to compare trends over time.
For your Pre-Paid retainer periods, you can track the amount of time or value you have Used versus how much is Remaining in a easy to read flood bar.
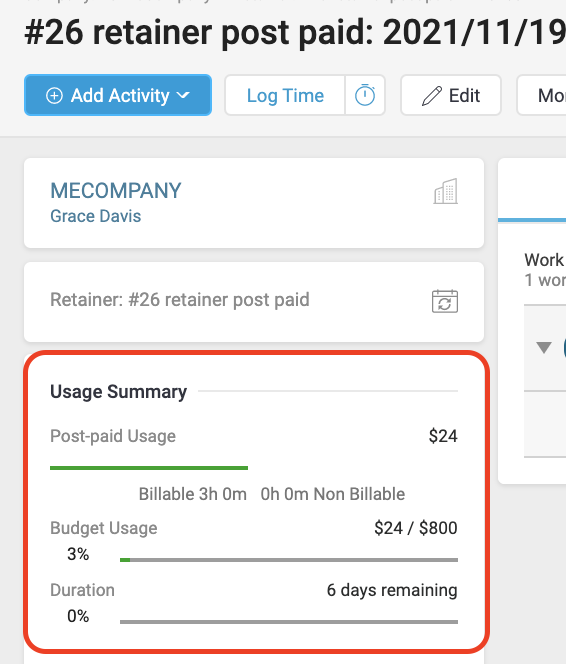
For your Post-Paid retainer periods, you will not see a Usage flood bar, instead you will see Total Hours Logged.
Your Period page will detail all billable time related to that specific period, including any linked Projects and Tickets. Open your Period page to see details of the usage such as what it’s Logged against (Ticket, Project, Task, etc), whether the time has been logged as billable versus non-billable, and the time and material value. Usage will only take into account billable hours logged, and will not include non-billable hours.
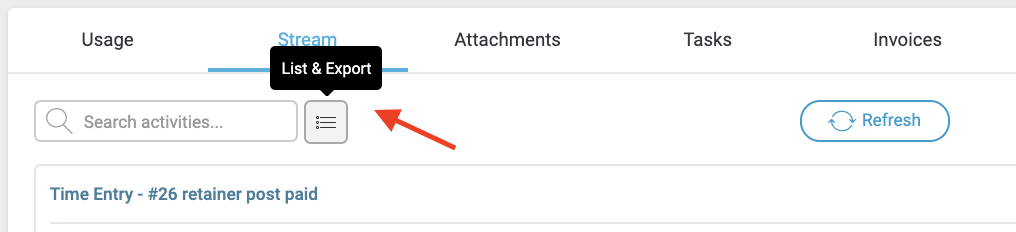
To see more details on the overall period usage, easily Export your Activity List, and share with your client exactly how you are utilizing your time. Simply go to that period’s Stream and click the List and Export button.
Click Next to learn how to Approve and Move Logged Work.
Track Usage in the Client Portal
Allow clients to keep track of their contract usage, right from their Client Portal. As you complete and log work against your Retainers, your clients can log in at any time to see how much time or value is left for that period. Giving your clients visibility into your progress allows you to provide more transparent and higher quality service to your clients - all while saving you time.
Approve and Move Logged Work
Review, edit and approve billable and non-billable activities for work completed against your retainers through the Manage and Approve Work tool, a Premium feature. Use your Approval tool to spot time entry mistakes, move entries between billable and non-billable and even move time entries between different Periods.
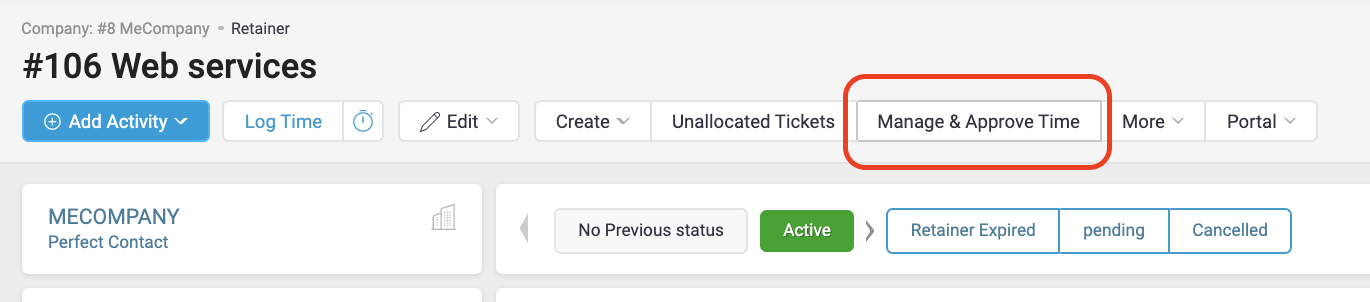
Access the Approval tool on the Retainer or Period page by clicking the Manage & Approve Time button in the Navigation bar.
On the Approval tool, your work is divided in sections by Retainer Period. Your most recent retainer period will be listed at the top.
Under each section you can see an overview of all activities logged for that retainer period. Expand the drop-down arrow next to Approved Activities and Previous Invoices to see details beneath each. To see a further breakdown of each activity logged, click the Activities expand and collapse button (![]() ).
).
In one view you can approve and invoice this logged work, move between billable and non-billable, and keep your retainers up to date. If you see time that belongs in another period, you can move it easily by dragging and dropping your work to the appropriate period.
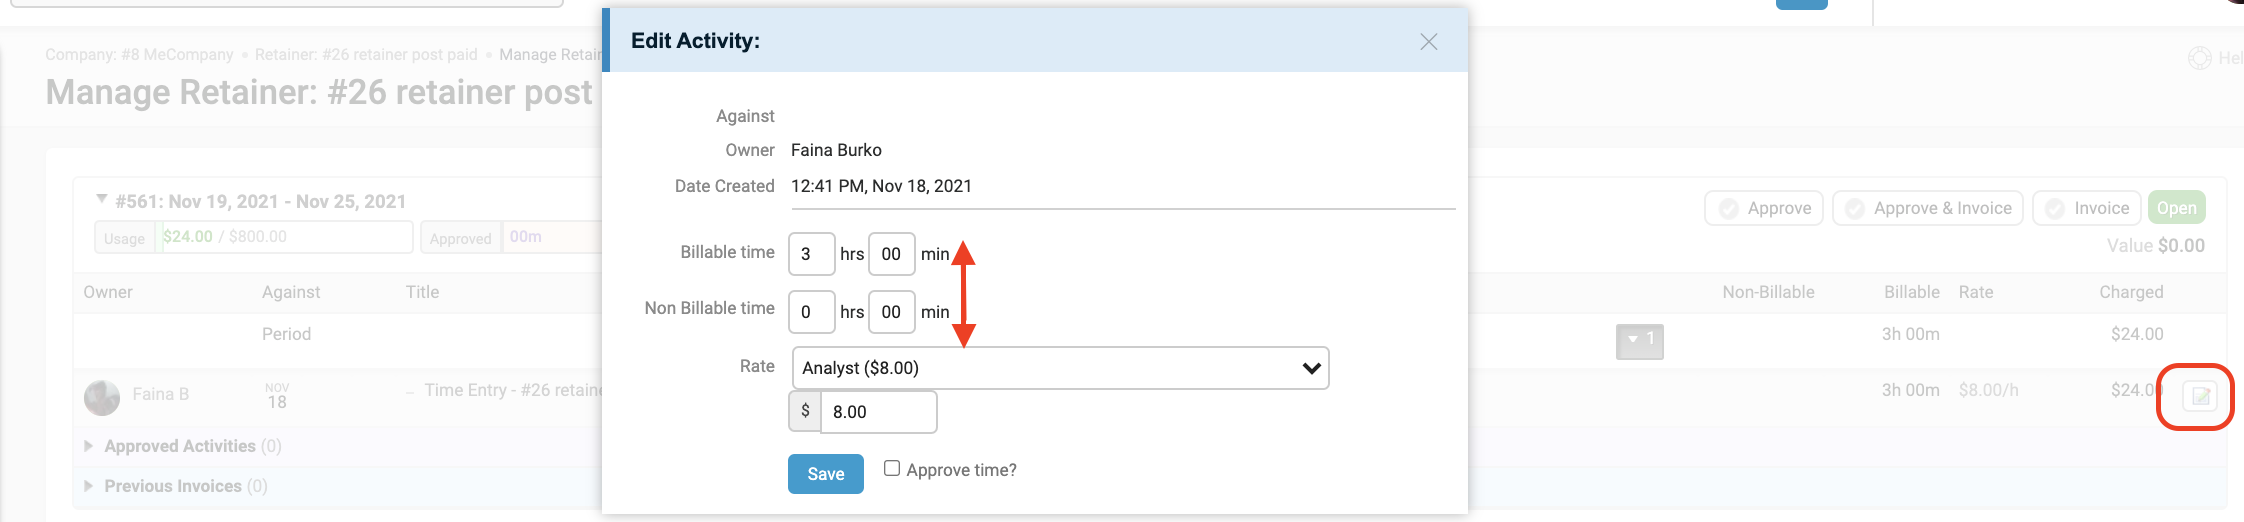
To move time between billable and non-billable click on the pencil button near the activity and move time from one section to another.
On every Period section, you can mark all activities approved by using the Approve button. Or click the Approve & Invoice button to open the Invoicing Tool and instantly start the billing process.

Click Next to learn about Retainer Invoicing.
Invoicing Retainers
Bill your clients for each period of your recurring work, and pull in all details you have set up under your Retainer template. Setup your Retainer billing to match what you have agreed upon within your recurring contractual agreements.
Within Retainer Invoicing you can create an invoice for each Billing Period upon creation, create your invoice upon each period completion, or anywhere in between. If you consistently invoice for the same amount at the beginning of each period, take advantage of Auto-create invoicing and save time on overhead costs.
Choose what time should be billable or non-billable using the Retainer Manage & Approve Tool, available for Premium Users. Customize the look of your PDF invoice by editing your invoice template.
Sync your Quickbooks or Xero account, and when you raise your Retainer Invoice in Accelo the details on each line item will be pushed automatically into your accounting software.
Close a Period
Ensure that you don’t miss billing for logged time by marking that Period Closed. Sometimes your staff may forget to log their time. When you Invoice for a Period at the completion of work performed, you can choose to “Invoice and Close” and ensure that any time logged, even if it’s added retroactively, will be pushed into the newest Period.