The content in this guide is currently being revised to align with the new user interface. Some text and images may be outdated.
Send Messages
In this guide, you can:
Create a Message
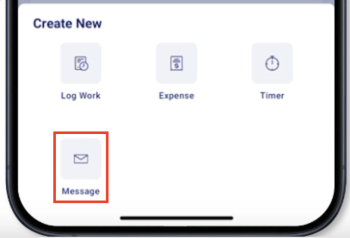
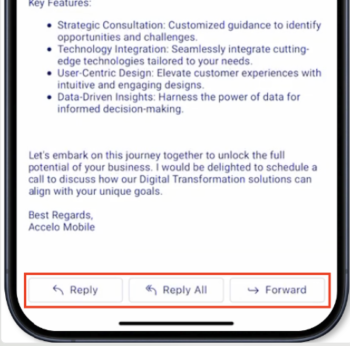
To create a message, you can:
-
Tap on Create button on the bottom bar, then choose Message
-
Tap on the Reply, Reply All, or Forward button from an existing message.
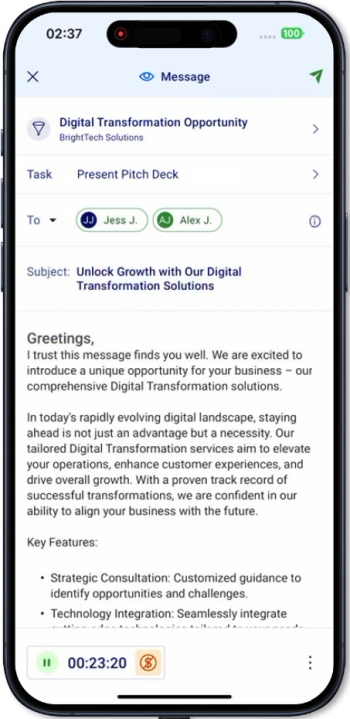
On the Create Message screen, you can enter the message recipients, details, and content.
 |
 |
The Create Message screen contains the following fields:
-
Against Object = the object the message will be linked against so that the activity will appear on the object stream.
-
Recipients = the contacts, staff, or groups that will receive the message
-
Subject = the subject to be used for the message email
-
Description = the main content of the message, which supports rich-text formatting, links, and images (soon)
- When entering the description, you get access to the following formatting tools:
- Paragraph styles
- Bold
- Italic
- Underline
- Numbering
- Bullets
- When entering the description, you get access to the following formatting tools:
Access the Toolbar
Configure the Billing settings
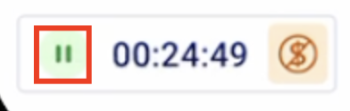
Billing Timer = records the total time spent composing the message, allowing the user to mark the activity as billable or non-billable. You can also pause, resume, or edit the timer.
- Pause the timer
- Tap on the pause icon to stop the timer from running
- Tap on the pause icon to stop the timer from running
- Edit the Timer
- Tap on the time counter

- Select the desired hours, minutes, and seconds
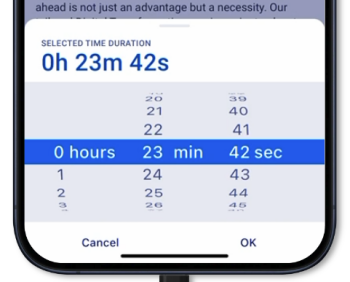
- Tap on OK
- Tap on the time counter
- Mark as billable or non-billable
- Tap on the Billable icon to switch the billing setting
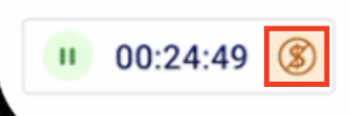
- Tap on the Billable icon to switch the billing setting
-
Change the Message Settings
To access the message settings, tap on the More button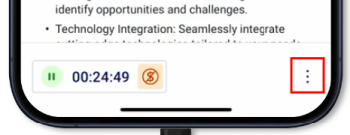
-
Select the message class
- Tap on Class
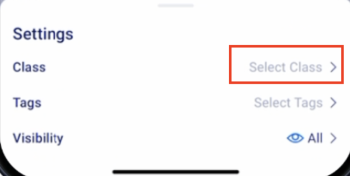
- This will bring up the list of all available classes
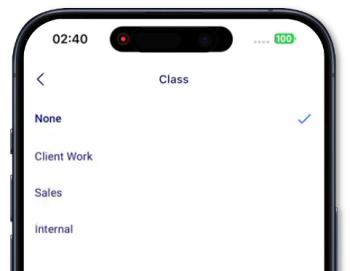
- The selected class will be shown.
- Tap on Class
-
Select Tags
-
Tap on Tags

-
This will bring up a list of all the activity tags, multiple tags can be selected.
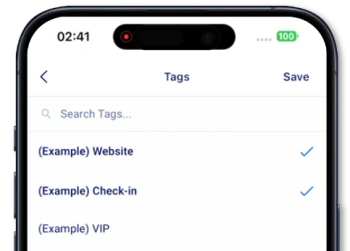
- Tap on save
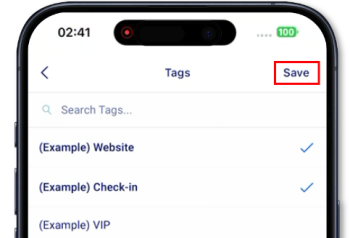
- Selected tags will be shown
-
-
Select the Message Visibility
-
Tap on visibility. By default, the parent message visibility is inherited. The Visibility allows to control which users can see the activity on the stream
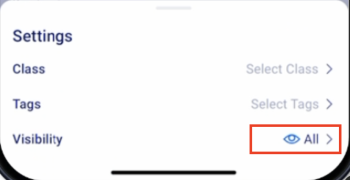
- This will bring up the list of available visibility types:
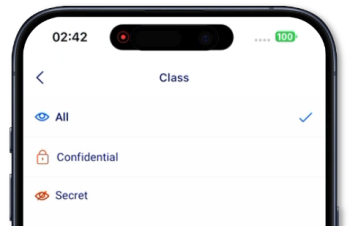
- All = the activity is visible to all users
- Confidential = the activity is visible to all, but the content is masked as “confidential” to users who are not recipients of the message
-
Secret = the activity is visible on stream only to the sender and recipients of the activity.
-
Note: Users cannot mark the activity as billable and cannot log time if the visibility is Secret.
-
-