The content in this guide is currently being revised to align with the new user interface. Some text and images may be outdated.
Bulk Delete Data
Delete Companies or Contacts without a Company (Standalone contact) that were accidentally added to your account through your configuration, or bulk delete any data while viewing a list.
Using this guide, you can:
Bulk Delete Companies or Contacts
Admin users can access the Bulk Delete Data feature under the Imports & Exports section in the Configuration page.
Bulk Deleting is tied in specifically to a Company Status. Accelo will generate a list to delete for every contact within a current status, such as a Lead, Active, Inactive, etc. If you do not want to delete all contacts that fall within a certain status, we recommend creating a new status to be used just for the bulk delete.
First add the new status, such as a "Delete" status, and then change the status of each Company you To add a new status, you must be an Admin and have a Premium account. Create a status under the Configuration Page > Companies & Contacts > Company Progressions. Then click New Status and name your status, such as "Delete".
To delete your data in bulk:
- Start under the Configuration Page > Imports & Exports > Bulk Delete Data.

-
After selecting Bulk Delete Data, the main Accelo window will change, asking you to specify a Company in Status or Contacts (without a Company) in Status.
-
Specify the Criteria for Bulk Delete. If you wish to delete all companies, then choose Company in Status and the option of "- All - ". Otherwise, select a status in the drop-down list. Only companies in this status will be removed.

-
Click Next (preview) to continue, where you will be presented with a list of companies or contacts to preview what you are about to delete. This confirmation screen lists all companies or contacts to be deleted. Please review the data for any that you don't want to delete.

-
If you find any you do not wish to delete, you should navigate to their Company Page to update that company or contact status and then restart the Bulk Delete process.
Note - Deleting a company will also delete sales, tickets, projects, retainers, invoices, receipts, tasks and activities associated with these objects. Contacts are also deleted provided they are only linked to that company. If a contact is also linked to another company not being deleted, then only the affiliation is removed. -
To finalize the delete process, click Delete permanently from the bottom of the window. This button is located at the bottom of the page as a way for you to scroll through the data you wish to delete before you do. Once you click delete, you will be emailed a confirmation once this process is completed.
Note - Clicking "Delete permanently" cannot be undone. Please avoid using Accelo whilst the bulk delete is running, and note that if you have a lot of data, the process may take upwards of one hour.
Bulk Delete Data in List View
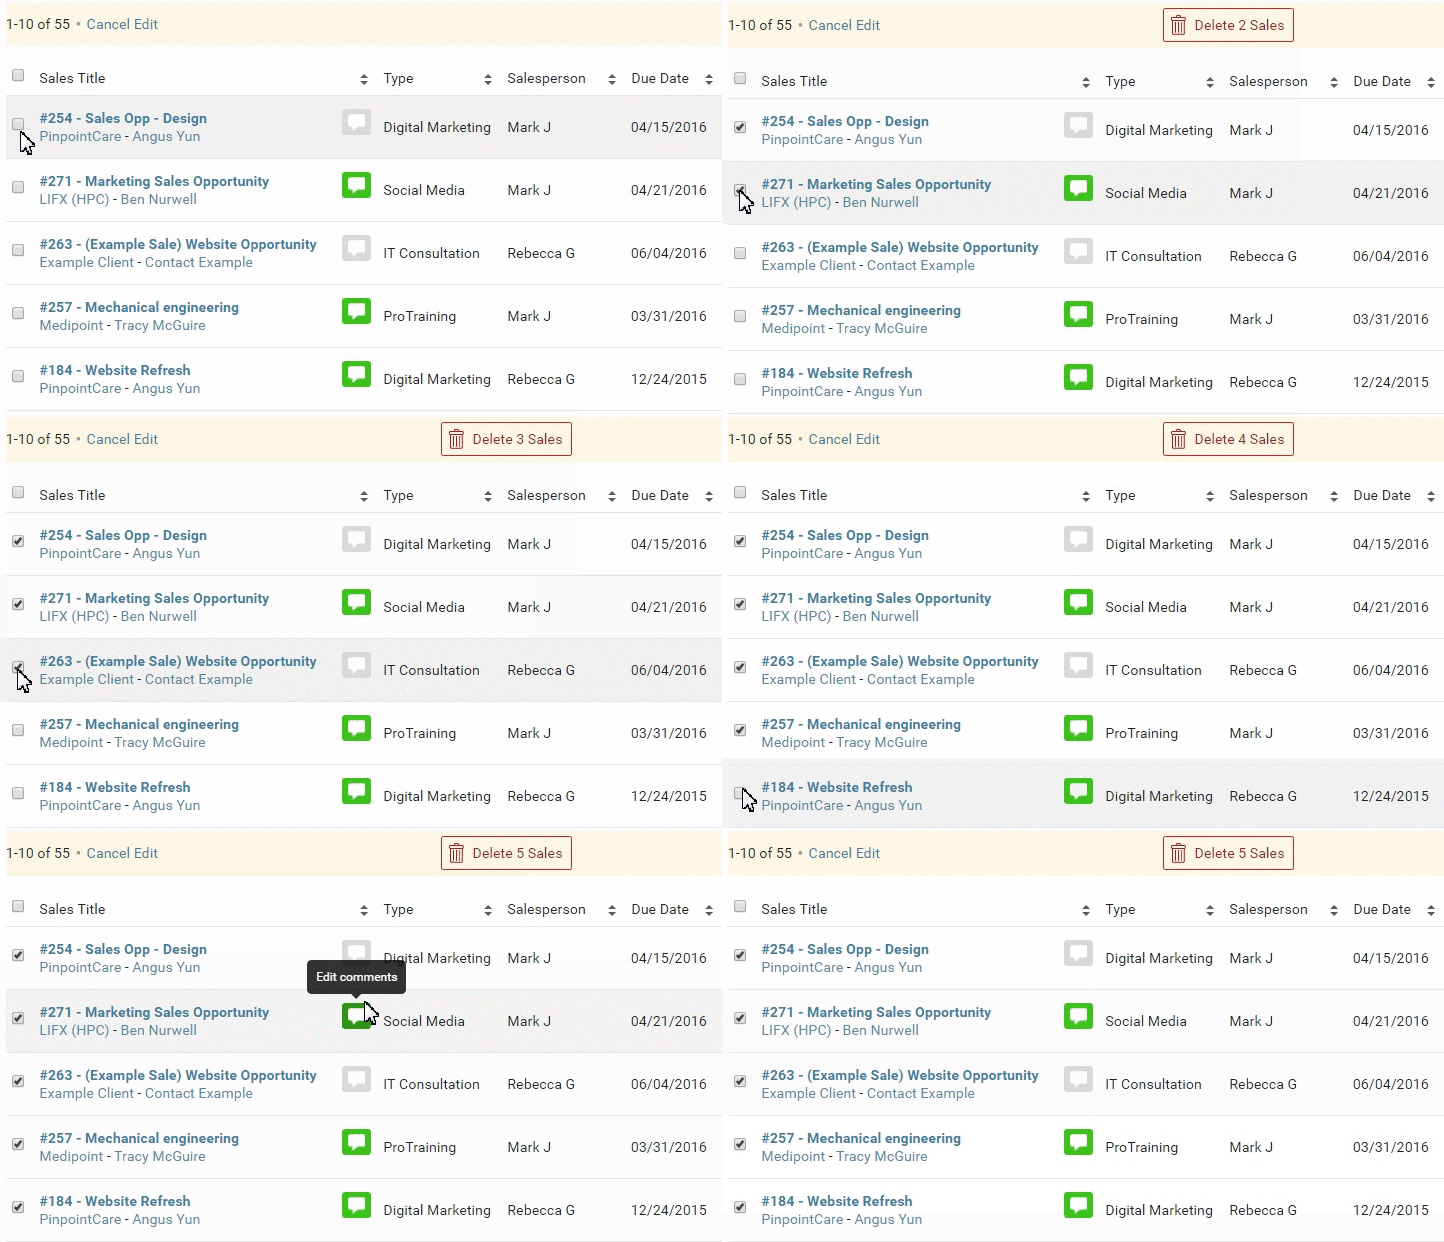
While viewing any list of items, such as Sales, Tickets, Companies, Contacts or Projects, you can now delete these items in bulk, saving you time as you clean up your lists. This is only available for admin users.
To bulk delete items in list view:
- View any list of Sales, Companies, Tickets, etc.
- Select Edit at the top of the list.

- Check the boxes next to each item you would like to delete. Check the box at the top of the list to select all.

- Select the red delete button at the top of the list.

- Select Yes on the window that pops up to confirm that you wish to permanently delete the items you selected. This cannot be reversed.

- Your request will be added to a queue, and it may take a few minutes to delete the items. In this window you will be able to see the percentage of the records that have been deleted as we respond to your request.

- Continue to view and work in this list as we delete the items, and an icon will be available in red at the top of the list to indicate that a Change is in Progress.

- The user that made the deletion will be sent a confirmation email when the process is complete.
To change settings to allow bulk deletion:
- Click the Module button in the top left of Accelo.

- Select Configuration.

- Select Users & Groups and then select Permissions.

- Select Companies, Contacts & Affiliations.

- Select the user you want to change permissions for from the drop-down list.

- Under Admin, check the box next to Bulk Delete Companies & Contacts to give permission to bulk delete.
